

Attendance Settings
The Attendance tab contains detailed settings that control how attendance tracking works at your center, from the Safe Arrival deadline for accounting for every child to health screening and automatic check-out.
How to Access
Navigate to Settings → Attendance tab.
Safe Arrival
Safe Arrival catches the child who never arrived and nobody noticed. When it is on, every enrolled child has to be checked in, checked out, or marked absent by the time your check-in window closes. Anyone still unaccounted for after that puts an email in front of your Owners and Admins, listing the children and their classrooms, so someone can call the family while it still matters.
This is the first section on the Attendance tab, and it holds your check-in window and grace period as well.
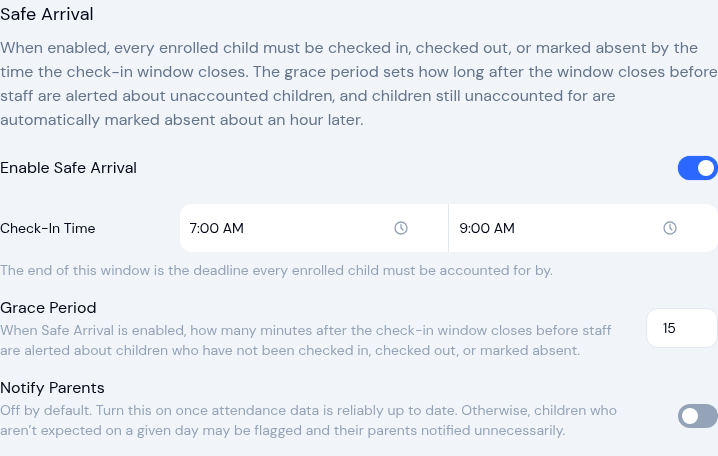
- Enable Safe Arrival — Off until you turn it on. Nothing below changes what KidzLog does until this is on.
- Check-In Time — The start and end of your drop-off window, for example 7:00 AM to 9:00 AM. The end of this window is the deadline every enrolled child must be accounted for by.
- Grace Period — How many minutes after the check-in window closes before the first alert goes out. Up to 60 minutes.
- Notify Parents — Appears once Safe Arrival is on. Off by default. When it is on, the child's own parents are emailed too, not just your staff.
What happens after the deadline
Take a 9:00 AM check-in window with a 15-minute grace period. From 9:15 AM, KidzLog looks for enrolled children with no check-in, no check-out, and no absence recorded for the day.
The first alert goes out
Owners and Admins get an email naming each unaccounted child and their classroom, with a link straight to the attendance page.
Up to three more reminders follow
Alerts repeat roughly every 15 minutes while anyone is still unaccounted for, four in total. The subject line counts them, so you can see at a glance whether this is the first nudge or the last.
Anyone still missing is marked absent
About an hour after the first alert, children who were never accounted for are marked absent automatically with the note "No arrival recorded", and a closing email confirms who was marked. Their record is a normal absence you can correct afterwards.
Checking a child in, checking them out, or marking them absent takes them off the list straight away. Once every child is accounted for, the alerts stop for the day. Safe Arrival only runs on weekdays.
Check-Out Time
Set the start and end of your pick-up window, for example 3:00 PM to 5:00 PM. This records the hours you expect children to be collected. It doesn't stop anyone checking out at another time, and children checked in past the end of the day are handled by Auto-Close instead.
The two windows have to make sense together. Each start time must come before its own end time, and your check-in window must finish before your pick-up window begins, otherwise saving fails with a message explaining which pair is out of order.
Kiosk Mode
Toggle Use Kiosk Mode to allow the attendance kiosk to be enabled on devices. When enabled, staff can activate kiosk mode from the attendance page, which locks the device into a PIN-based check-in/out interface for parents.
QR Code Check-In
Let parents check themselves in from their own phone by scanning a QR code at your entrance, instead of using a shared kiosk tablet.
Turn on Enable QR Code Check-In. A QR code and a check-in link appear below the toggle.
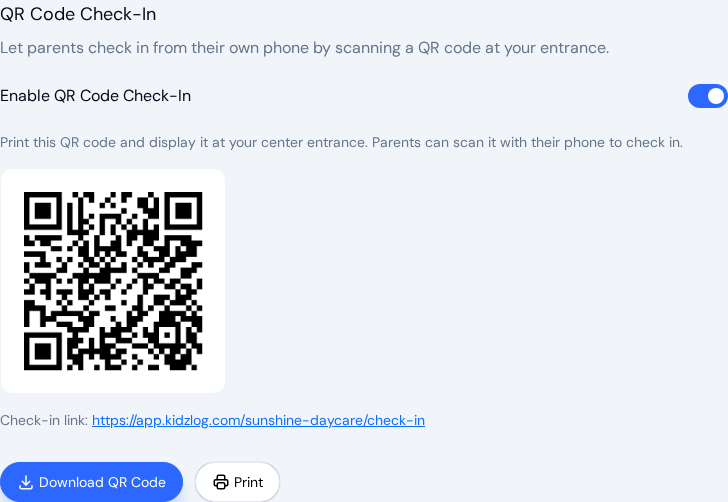
- Download QR Code saves the code as an image you can add to a sign or newsletter.
- Print opens a print-ready page with the code and link.
Display the printed code where parents arrive. When a parent scans it, they enter their kiosk PIN and check their child in or out, the same way they would at the kiosk. QR Code Check-In walks through what parents see on their phone.
Turning Enable QR Code Check-In off switches the QR check-in flow off completely, not only the code on this page. Codes you have already printed and links parents have saved stop working. Someone who opens one sees Check-in unavailable and This center has not enabled QR check-in. A parent who already had the page open when you switched it off sees QR check-in is currently disabled for this center. at their next step. This covers the whole QR flow: entering a PIN, checking in or out, the health screen, and signing.
Digital Signatures
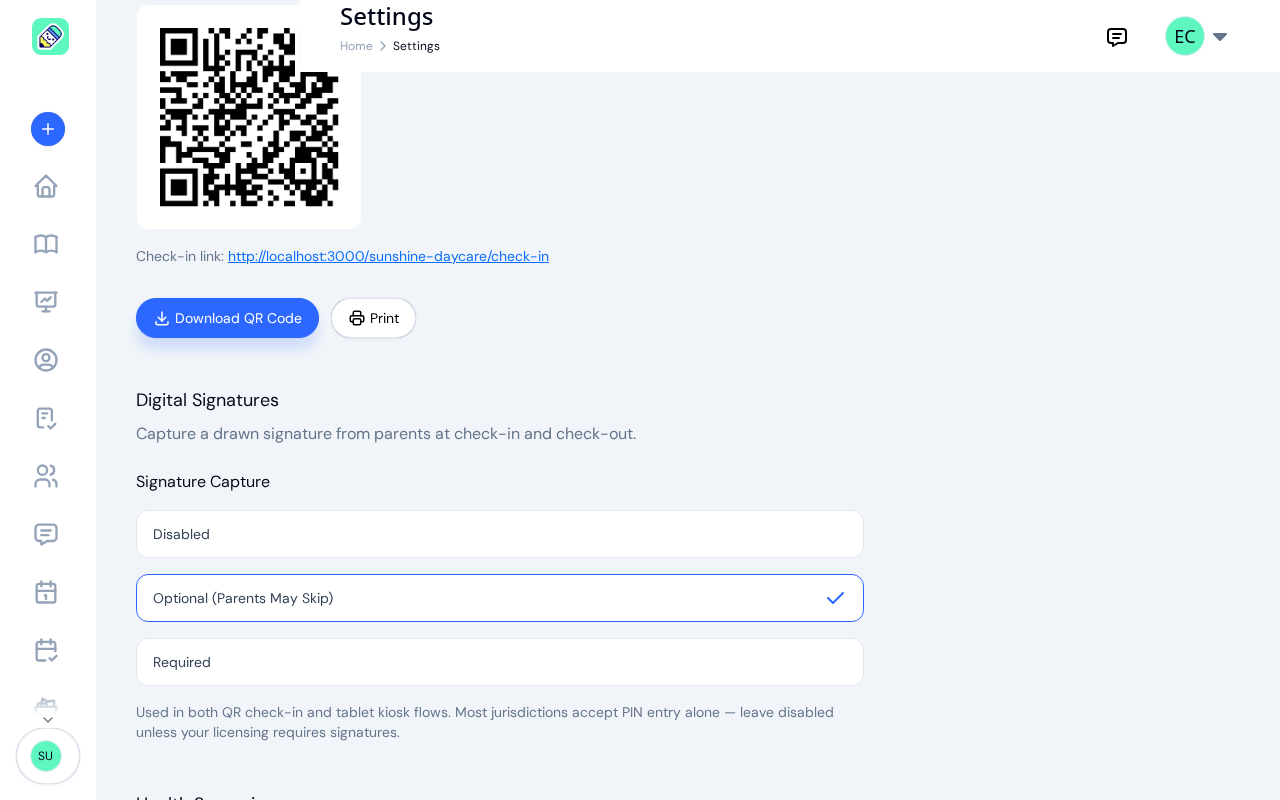
Capture a drawn signature from parents at check-in and check-out. Signatures are collected in both the QR code check-in and the tablet kiosk flows.
Under Signature Capture, choose one of three options:
- Disabled — no signature is requested.
- Optional (parents may skip) — parents are asked to sign but can continue without one.
- Required — parents must sign before the check-in or check-out is recorded.
Health Screening
Enable Health Screening to require a health check questionnaire during check-in. When enabled:
- Parents answer health screening questions before completing check-in (both in the kiosk and admin check-in flows)
- You can optionally allow parents to complete screening at home before arriving
- Manage your screening questions — add custom yes/no questions that must be answered
Auto-Close
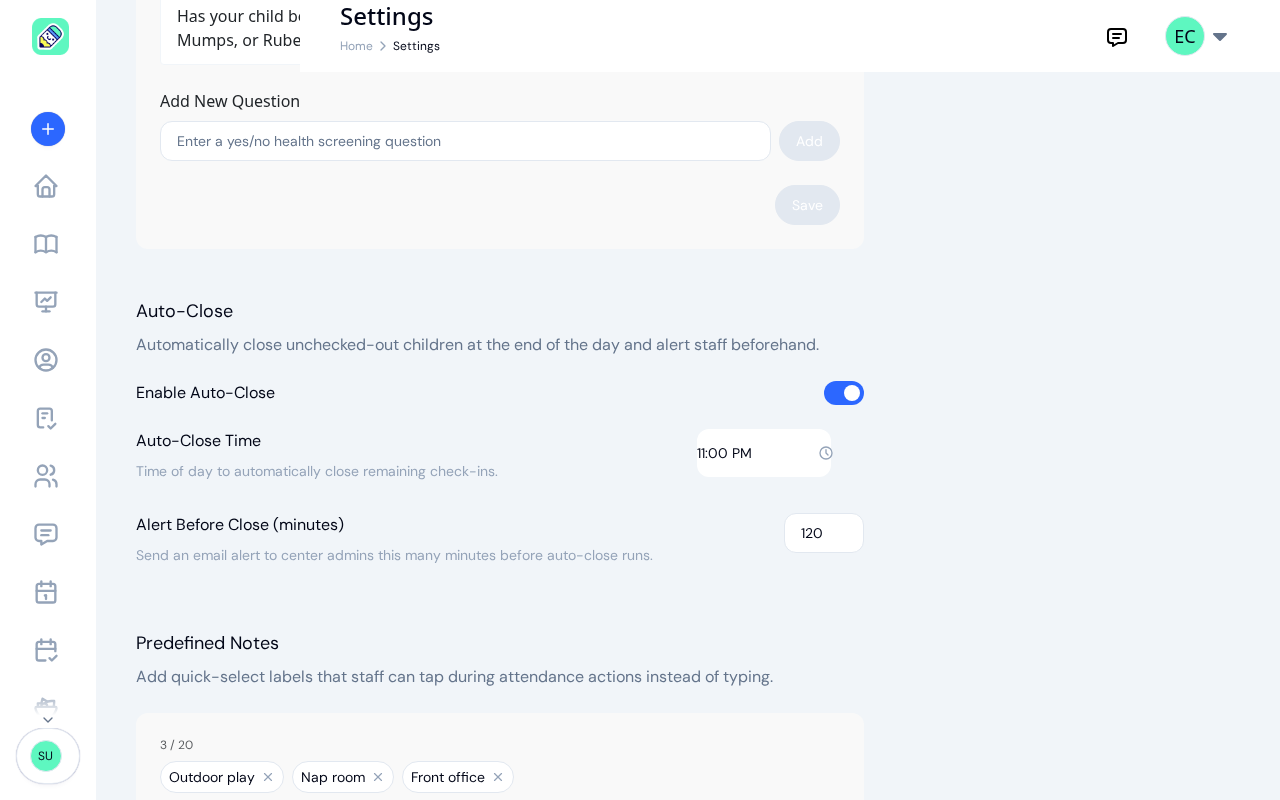
Automatically check out children who are still marked as checked in at the end of the day.
- Enable Auto-Close — Toggle the feature on or off. The time and alert fields appear once it's on
- Auto-Close Time — The time of day to automatically close remaining check-ins, typically after your center closes
- Alert Before Close (minutes) — Send an email alert to center admins this many minutes before auto-close runs. Set it to 0 for no warning email, up to 480 minutes for eight hours' notice
Predefined Notes
Add quick-select labels that staff can tap during attendance actions instead of typing. These appear as selectable pills in the check-in, check-out, and absent modals.
Examples: "Art Room", "Gym", "Outdoor Play", "Early pickup"
Type a label in the text field and click Add. You can add up to 20 predefined notes.
Historical Attendance Editing
Control who can edit past attendance records and how far back:
- Lock records after (days) — Records older than this many days can only be edited by the owner. Set to 0 to disable locking (default: 30 days)
- Who can edit historical attendance? — Toggle Admin and Teacher access to historical records separately
Click Save at the bottom of the page after making any changes.