

Incidents Overview
The Incidents page lets staff report and track incidents involving children — such as injuries, behavioral events, or safety concerns. Incidents go through an approval workflow before becoming visible to parents.
How to Access
Navigate to Incidents in the sidebar.
Incident Dashboard
The dashboard shows five summary cards:
- Pending Approval — incidents waiting for admin/owner review
- Approved — incidents that have been reviewed and approved
- Awaiting Signature — approved incidents a parent has not signed yet
- Total Incidents — all incidents combined
- Reportable — incidents marked at the highest severity, which usually must be reported to your licensing body

Use the filter tabs to switch between All, Pending Approval, Approved, and Awaiting Signature, and narrow the list further by incident type or severity.

The Awaiting Signature tab and card show which approved incidents a parent still needs to acknowledge, so you can follow up with families who haven't signed yet.
Both the cards and the filters cover every incident at your center, not just the ones on the page in front of you. Filtering to reportable injuries searches your whole history and tells you how many there are, so the answer you get is the answer for the center. Longer lists page in the standard way. See How lists work.
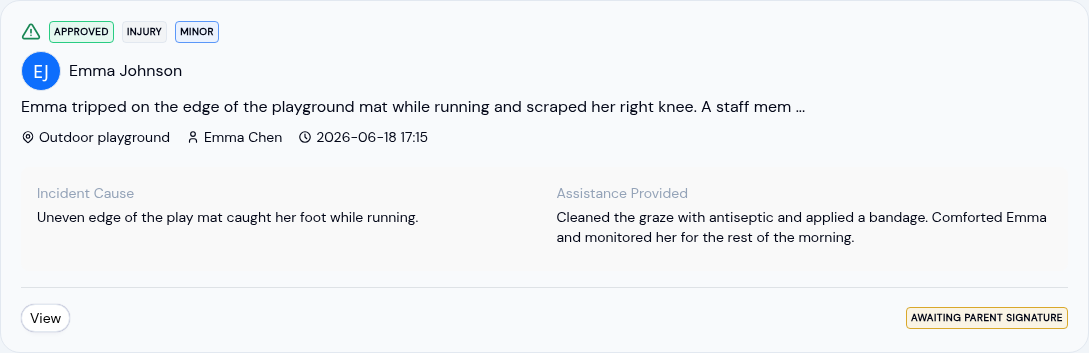
Each incident card shows:
- Status badge (Pending or Approved)
- Type and severity badges (for example, Injury and Minor)
- Description preview
- Where it happened, reporter name, and timestamp
- Incident cause and assistance provided
- Parent signature status ("Awaiting parent signature" or "Signed")
Reporting an Incident
Click the + Report Incident button in the top-right corner.
Select the child
Search for and select the child involved. A separate report is created for each selected child if you select more than one.
Start with the incident type
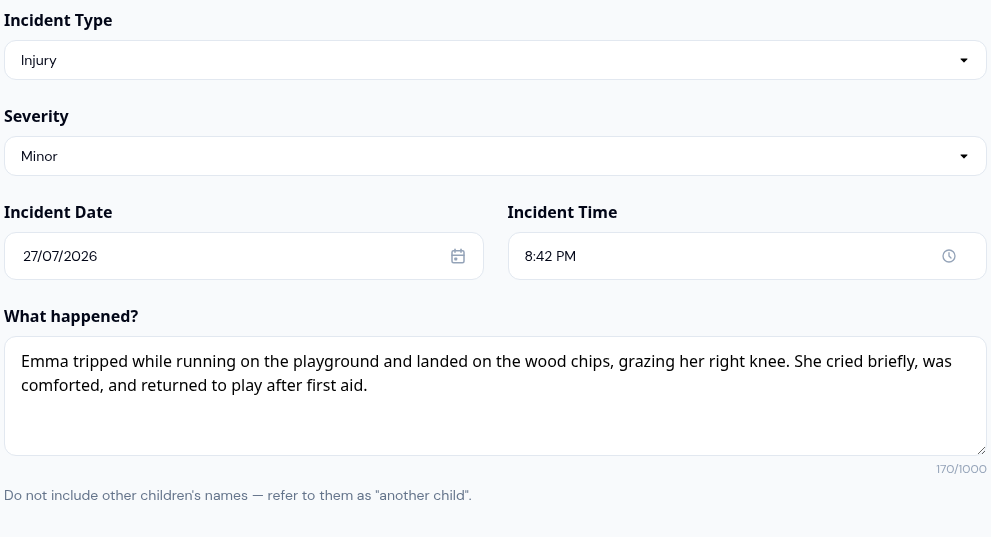
Incident Type is the first question on the form because it decides everything below it: Injury, Illness, Behavioral, Allergic reaction, Near-miss, or Other. Choosing Injury or Allergic reaction opens the injury questions further down. Next, set the Severity: Minor, Serious, or Reportable. Choose Reportable for anything serious enough to report to your licensing body.
Describe what happened
- Incident Date and Incident Time — when it happened
- What happened? — your account of the incident, up to 1,000 characters
- Incident Cause — what led to it, up to 1,000 characters
- Where did this incident occur? — tap the places that apply: Classroom, Bathroom, Hallway, Stairway, Sidewalk, Parking lot, Playground, Kitchen, Field trip, Bus, Car, or Other. Picking Other opens a box to describe the spot in your own words.
Add the injury details
These questions appear only when the type is Injury or Allergic reaction. All of them are optional, so fill in what you know.
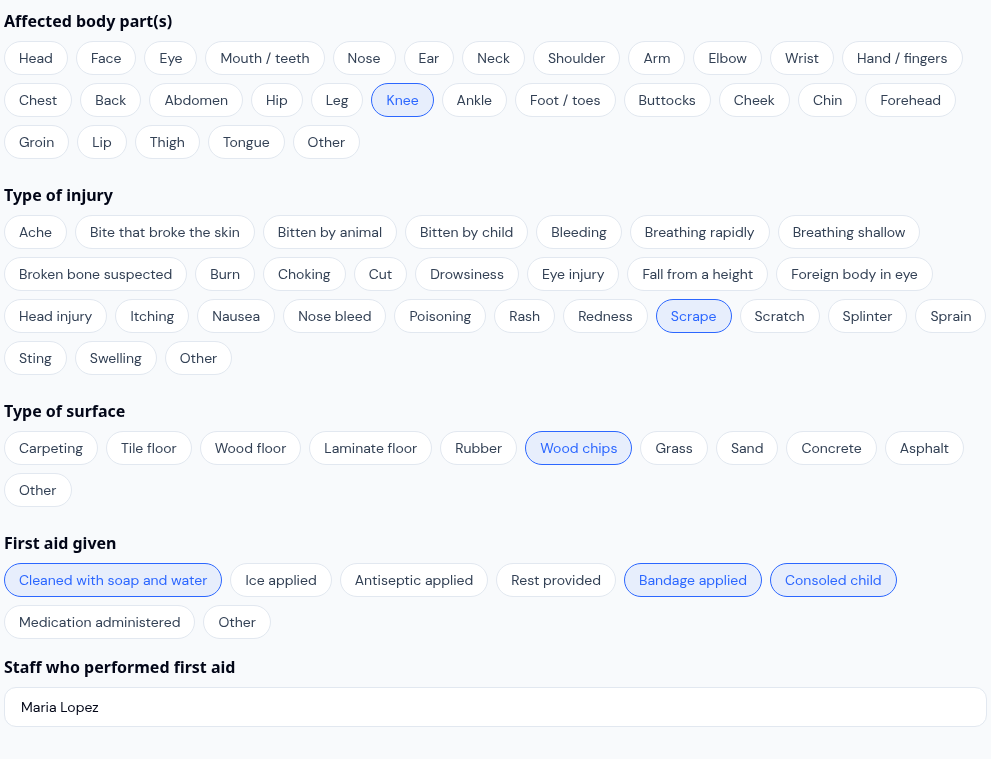
- Affected body part(s) — tap every part involved, from head and forehead through knee, thigh, and foot or toes
- Type of injury — what the child sustained: a cut, scrape, bite that broke the skin, suspected broken bone, burn, sting, rash, and so on. Choosing Fall from a height opens a Fall height box, for example "3 feet"
- Type of surface — what the child landed on or struck: carpeting, tile, wood chips, grass, concrete, and the rest
- First aid given — what you did at the center: cleaned with soap and water, applied ice, applied a bandage, consoled the child, and so on. As soon as you pick anything here, Staff who performed first aid appears and must be filled in
List anyone else involved
Click Add witness for each person who saw the incident or was caught up in it. Every row has five parts, and only the name and role are worth filling in every time:
- Witness Name
- Role — Staff, Child or Other. Pick Child for another child from the center: it is what lets the parent's copy number them as Child #1, Child #2 rather than naming them
- Relationship to child — how they relate to the child the report is filed for, for example "Teacher", "Classmate", or "Grandparent"
- Age — free text, so "4" and "18 months" both work
- Other important information — anything else worth recording about that person
Relationship, age, and other information are optional and appear on every report, whichever form your center files.
Above the rows, a line tells you what a parent will see of this list. It reads Kept on your copy only. Parents do not see these rows. unless your center has changed the setting, which is covered under Incident Settings.
Answer the safeguarding question, if your form asks it
Centers whose state licensing form covers abuse and neglect see Does the nature of this incident indicate abuse or neglect? as a required Yes or No, with no answer pre-selected. Answering Yes opens a staff-only Child abuse hotline report block where you record the hotline screener's name or ID, the date and time of the call, and any comments. That block is never shared with parents.
See Which report you are filing below for which centers see this question.
Record your response
- Actions Taken — what you did for the child, up to 1,000 characters
- Outside medical attention — tap what happened beyond the center: an ambulance or 911 call, poison control called, transported to emergency or urgent care, a physician or health care provider consulted, or Other with a box to describe it
Record how you told the parent
Turn on Was a parent/guardian notified? and the notification questions appear:
- Notification Date and Notification Time
- Notification Method — Notified by phone, Notified by email, Notified via KidzLog, Notified at pick up, or Other
- Notification comments — anything worth recording about the conversation, up to 500 characters
Turn on Was the child sent home? if the child was collected early, and record the pickup date and time.
Finish and sign
- Add Media (Optional) — attach photos or videos that help tell the story
- Additional Notes — extra observations parents can see, up to 500 characters
- Internal Notes (staff only) — kept for your records and never shared with parents, up to 1,000 characters
- Reported By — your name, filled in and locked
- Reporter Signature — Draw your signature, or switch to Type and enter your name in a handwriting style. Your name is filled in for you. If you've saved a signature on your profile, it loads automatically so you don't have to sign again
Submit the report
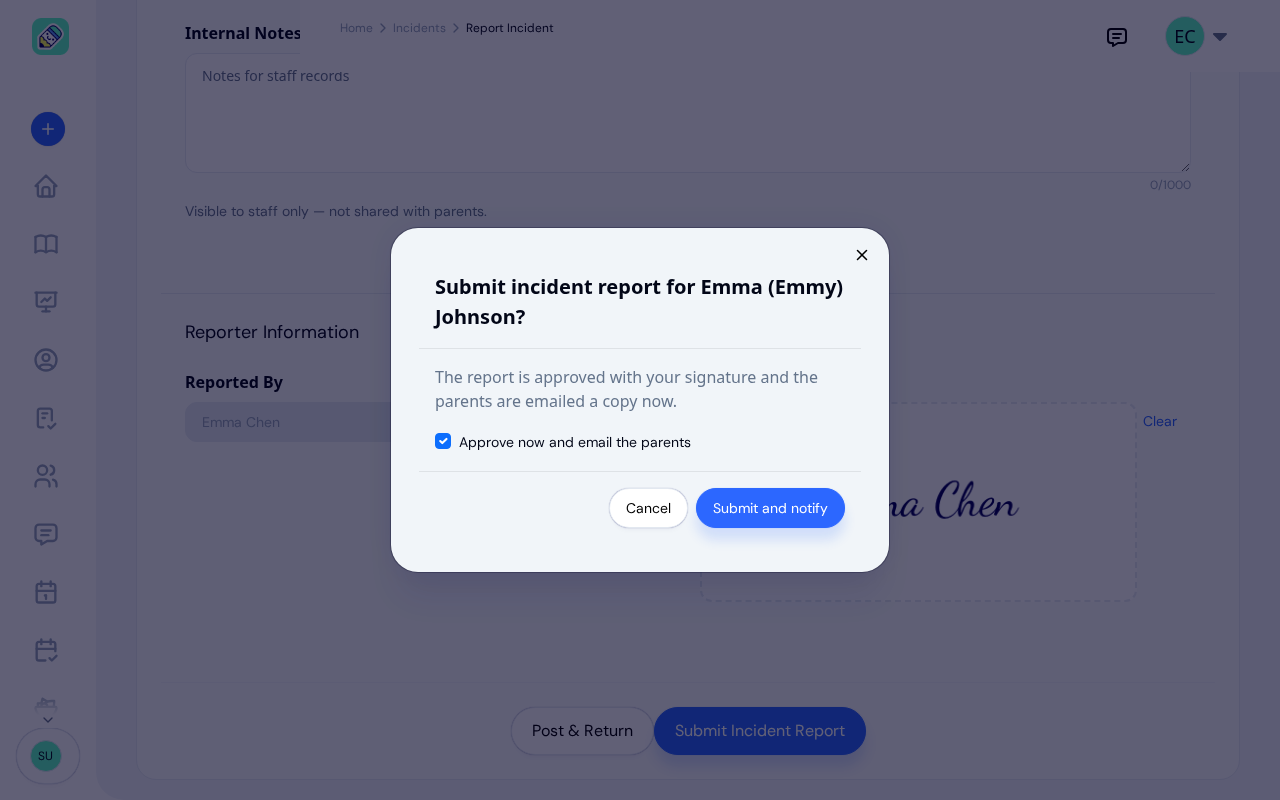
Click Submit Incident Report, or Post & Return to submit and go back to the list. Either way, a confirmation asks you to check before anything is saved. Its title names the child, for example "Submit incident report for Emma (Emmy) Johnson?".
- Owners and admins see a checkbox, Approve now and email the parents, ticked to start with. Leave it ticked and click Submit and notify: the report is approved with your signature and the parents are emailed a copy straight away. Untick it and the button changes to Submit for approval: the report is saved as pending, nothing is sent, and you or another admin approve it later from the report page.
- Teachers see no checkbox. The confirmation explains that the report goes to a director or admin for approval and that the parents are not emailed until then. Click Submit for approval.
Click Cancel to go back to the form with everything you entered still in place.
Which Report You Are Filing
Your center's state decides which report an incident becomes, so the wording on screen and on the printed copy matches the paperwork your licensing office expects.
Most centers file a single report called Incident Report, whatever the type. It carries the sections you filled in: incident details, injury details, treatment and response, parent notification, witnesses, and additional notes, each showing only what you actually entered. That is the report the rest of this page describes.
New Jersey centers file one of the two forms the Office of Licensing publishes instead, chosen automatically from the incident type. They are separate documents with their own wording, notices, and layout, so each has its own page:
- Accident / Injury Report — for Injury and Allergic reaction
- Unusual Incident Report — for every other type
Approval Workflow
When a teacher or staff member reports an incident, it enters Pending Approval status. A pending count appears on the Dashboard widget.
To approve an incident:
- Click View on the incident card, or open the incident from the list
- Review all details — description, cause, response, photos
- Click Approve (in the header or the status banner)
- In the approval window, your name is filled in automatically. Sign to approve: Draw your signature or switch to Type and enter your name. If you've saved a signature on your profile, it loads automatically.
- Click Approve to confirm
Once approved, the incident becomes visible to the child's parents in the Parent Portal.
Letting Parents Know
When you approve an incident, the child's parents automatically receive an email letting them know and asking them to review and sign the report. For serious or reportable incidents, the email is flagged as important so parents notice it right away. Minor incidents use a standard tone.
Parents open the report in the Parent Portal, read it, and add their signature to acknowledge it. Until they sign, the incident stays under the Awaiting Signature tab and card so you can follow up.
What Parents See of the Witnesses List
Your center chooses how much of the Witnesses list reaches a parent: nothing at all (the starting point for every center), your staff by name with children and others numbered, or everything. The choice applies to the copy a parent reads and prints, never to yours. See Incident Settings for the three options and who can change them.
Incident Detail Page
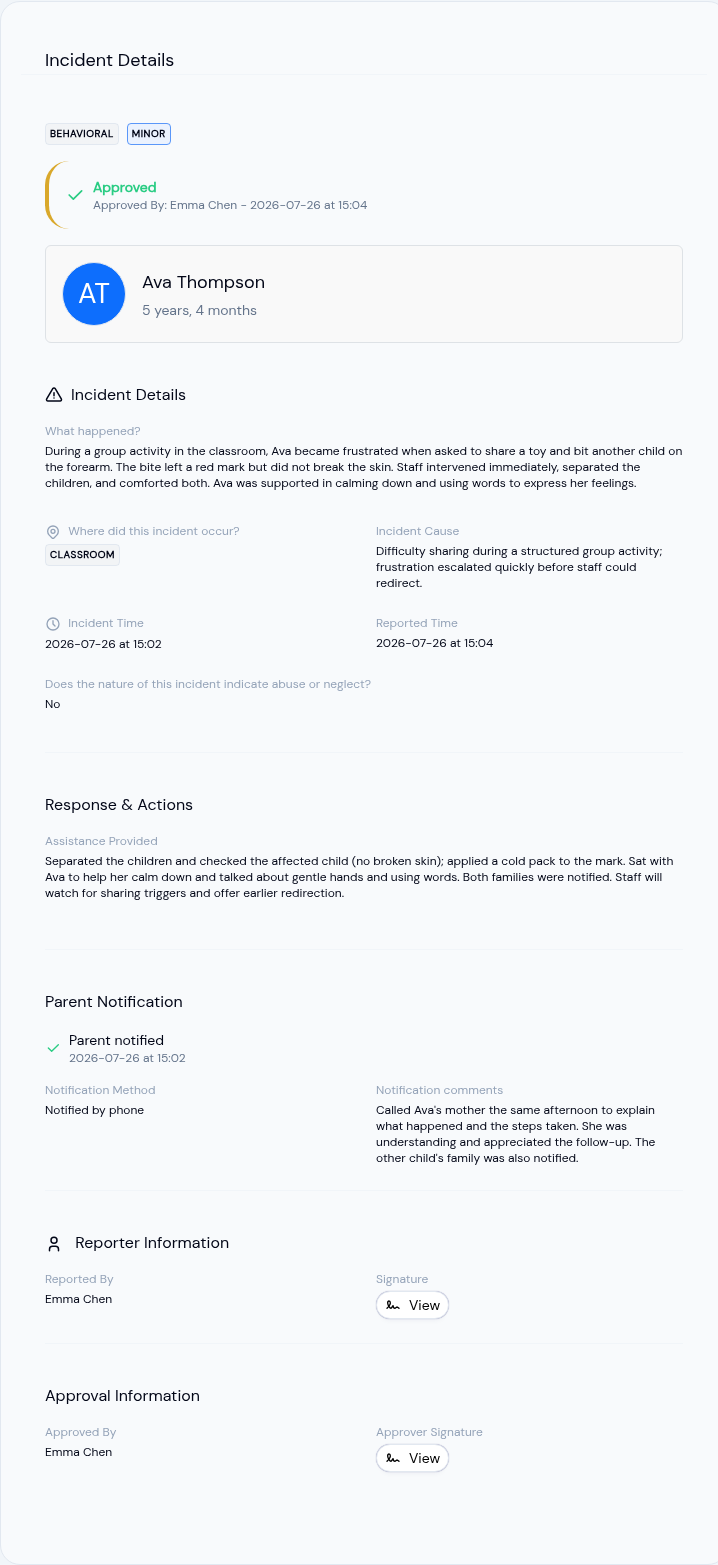
The buttons in the page header change with the report's state. A pending report offers Edit, Approve (admins and owners) and Delete. An approved report the parent has not signed yet offers Reopen for editing instead. Once the parent has signed, the header shows no action buttons at all. See Correcting or Removing a Report below.
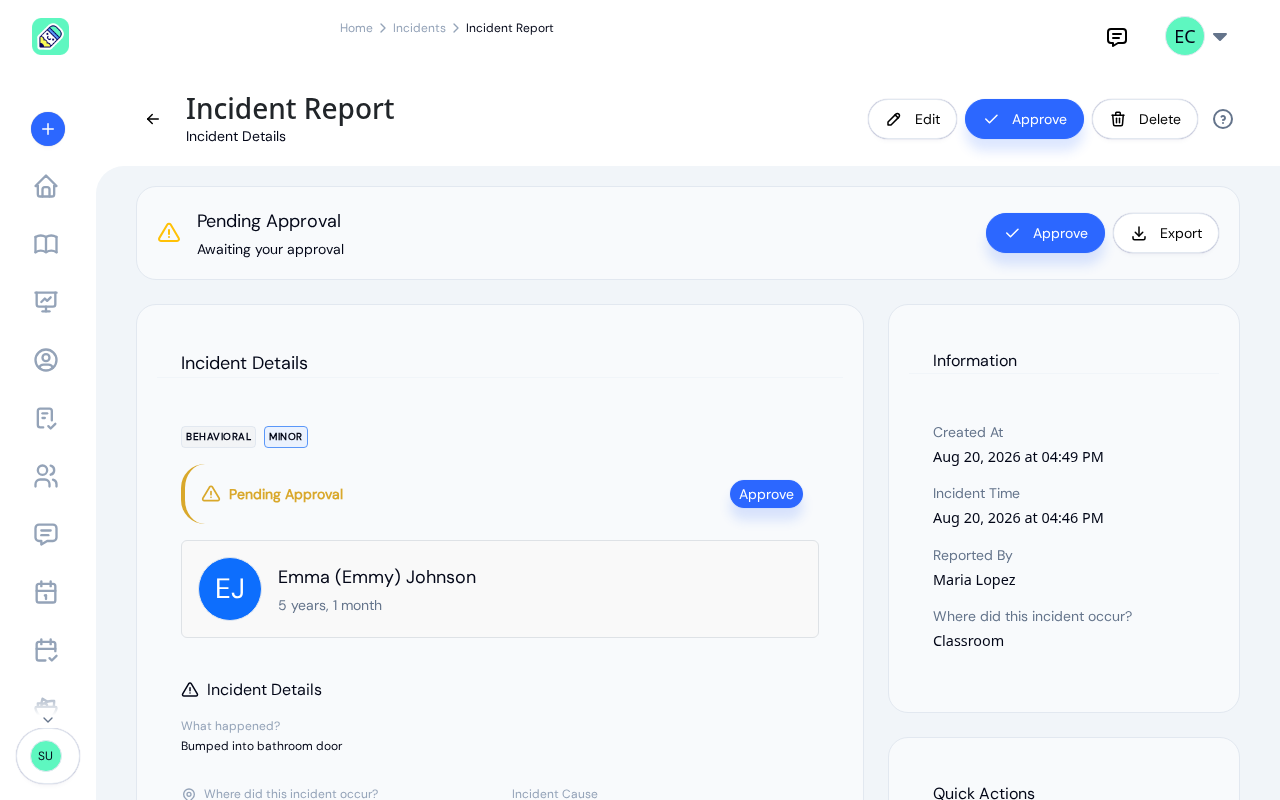
The detail page has two columns:
Left — Incident Details:
- Type and severity badges at the top (for example, Injury and Minor)
- Status banner — Approved (green) or Pending (yellow), with approver name
- Child card — name, age, and avatar
- Incident Details — what happened, the cause, where it occurred, and the timestamps
- Safeguarding — the abuse-or-neglect answer, and for staff the hotline report details, on the reports that ask for them
- Affected body part(s) — for injuries and allergic reactions, the body parts involved, shown as chips
- Injury details — type of injury (with the fall height when recorded) and type of surface
- Witnesses — everyone recorded on the report, each shown as the name followed by the relationship in brackets, then the age and other information when those were filled in. Where no relationship was recorded, the role (Staff, Child or Other) appears in brackets instead
- Response & Actions — actions taken, first aid given and who gave it, and any outside medical attention
- Parent notification — whether the parent was told, when, how, and any comments, plus whether the child went home
- Reporter Information — name and signature (tap View to see the drawn signature)
- Approval Information — approver name and signature (once approved)
- Internal Notes (staff only) — shown to staff only, never shared with parents
Sections with nothing in them are left out, so a short report stays short. The field wording here matches the report your center files, so what you read on screen is what prints.
Right — Information Sidebar:
- Created at, incident time, reported by, location, and (once approved) the approver and approval time
- Quick Actions — an Export Report option, plus a "Notify Parent Again" option when the parent has already been notified
Printing or Saving a Copy
Export Report asks you to confirm, then opens a clean, print-ready copy of the report in a new browser tab and brings up your browser's print dialog. From there you can print it or choose Save as PDF for your files.
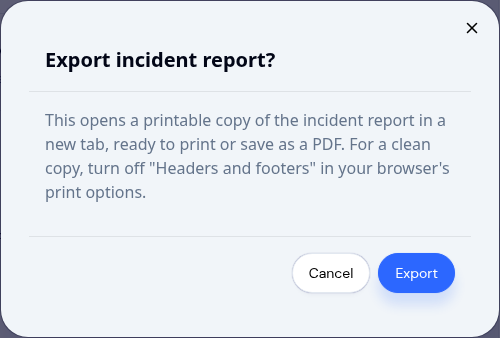
The printed copy carries your center's name, the full report, and the drawn signatures of the reporter, the approver, and the parent once they've signed, each with a name and the date and time it was signed. Long reports flow across pages, so nothing is cut off part-way through a section.
Correcting or Removing a Report
What you can do to a report depends on where it is in the approval workflow. The same rules apply on the incident detail page and in the ... menu of an incident card in a child's Activity tab.
Editing a pending report
Pending incidents can be corrected before they are approved. Open the incident and click Edit. When you click Save Changes, a confirmation reminds you that the report stays pending approval; saving an edit never approves it. Approve it afterwards with Approve on the report page.
- Teachers can edit incidents they reported themselves.
- Admins and owners can edit any pending incident.
Deleting a pending report
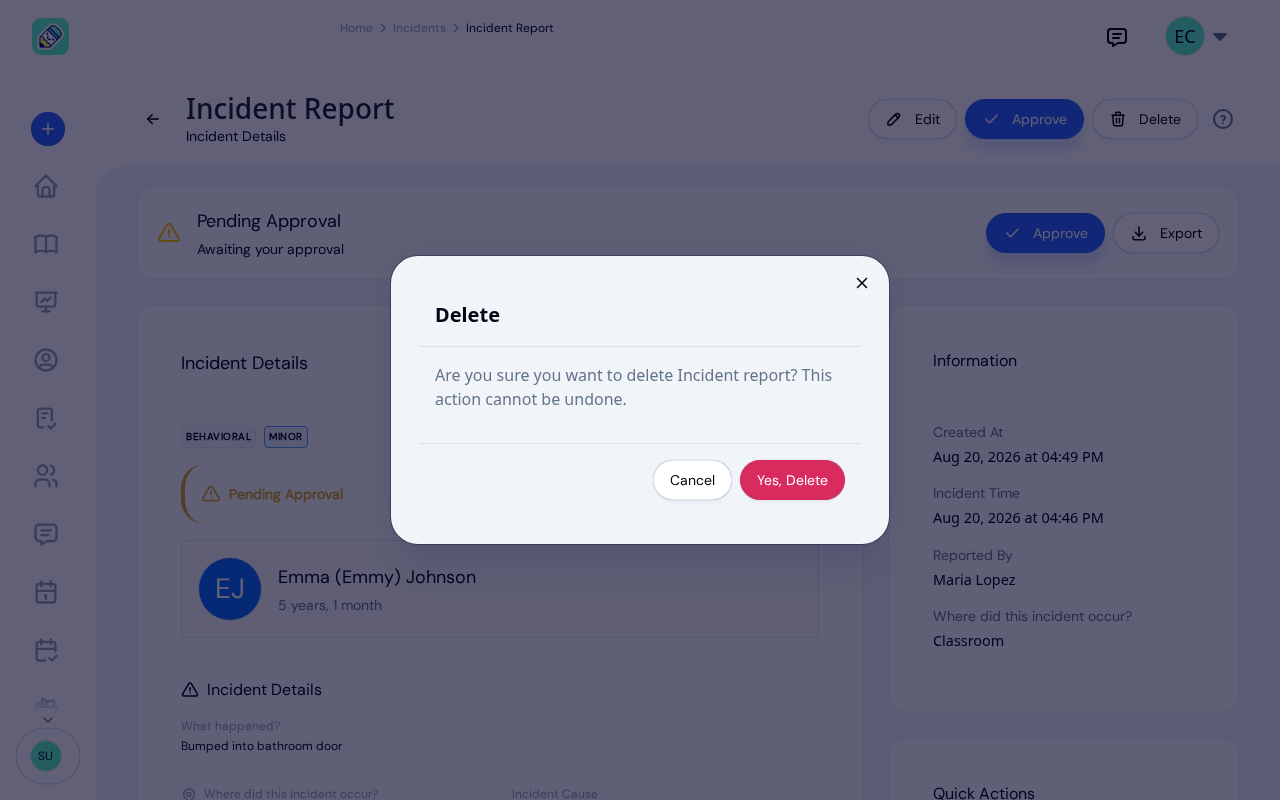
A report that was filed by mistake, or for the wrong child, can be removed while it is still pending. Open the incident and click Delete. A confirmation asks you to be sure; click Yes, Delete.
- Teachers can delete pending reports they filed themselves.
- Admins and owners can delete any pending report in the center.
Once a report is approved it can no longer be deleted, and the Delete button disappears. Approval is the moment the report reaches the parent and becomes part of the center's records, so from then on it stays on file. A deleted report leaves every screen, but the center keeps a copy behind the scenes and the deletion is recorded in the audit log.
Reopening an approved report
Owners and admins can correct an approved report as long as the parent has not signed it yet. Open the incident and click Reopen for editing. The confirmation explains what happens next: the report returns to pending, can be edited again, and must be approved a second time. Reopening is recorded in the audit log.
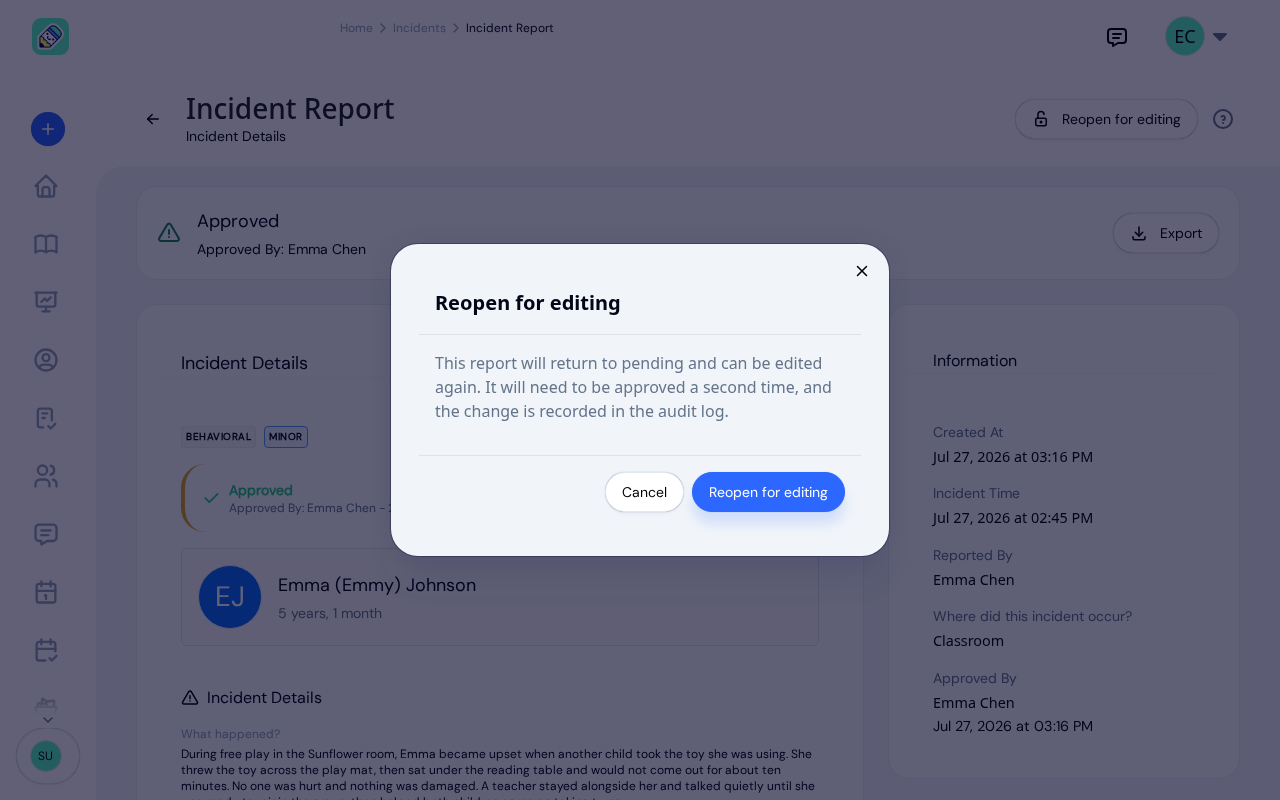
This is how an owner or admin fixes a typo in a report they approved as they submitted it: reopening is the way back to the editor.
Once the parent has signed, the report is locked for good. They signed against the text as it stood, so it cannot change underneath them. If a signed report needs correcting, file a new one.
Frequently Asked Questions
Yes. Both teachers and administrators can report incidents. However, only administrators and owners can approve them.
Parents can only see approved incidents. This gives administrators time to review the report before it reaches parents. Once approved, parents can view the incident and provide their signature.
After an incident is approved, parents are asked to sign the report to acknowledge they've reviewed it. The signature status appears on the incident card ("Awaiting parent signature" or "Signed").
Not directly. An owner or admin can click Reopen for editing on an approved report the parent has not signed yet; it returns to pending, can be corrected, and then needs approving again. Once the parent has signed, the report is locked for good. Before approval, a pending incident can be edited as normal: teachers their own reports, admins or owners any pending report.
Only while it is pending. Open the report and click Delete. Teachers can delete reports they filed themselves; admins and owners can delete any pending report. Once approved, a report stays on file and the button is gone. Nothing is destroyed when you delete: the center keeps a copy behind the scenes and the deletion is recorded in the audit log.
Severity has three levels: Minor, Serious, and Reportable. Mark an incident Reportable when it is serious enough that you must report it to your licensing body or local authorities. Reportable incidents are counted on their own summary card so they are easy to find.
The report is waiting for approval. A teacher's report always waits, and an owner's or admin's report waits when Approve now and email the parents was unticked in the confirmation. Open the report and click Approve: the parents are emailed as soon as it is approved.
Yes. Approving an incident automatically emails the child's parents to review and sign it. Serious and reportable incidents are flagged as important in the email. You can also turn on an optional reminder that emails parents once if a report stays unsigned for about two days — see Notification Settings.
The Affected body part(s) picker, along with the type of injury, type of surface, and first aid questions, only shows when the Incident Type is Injury or Allergic reaction. For other types they stay hidden. All of them are optional, and you can choose more than one of each.
That question belongs to the state licensing form, not to every incident. Centers in a state whose form covers it, New Jersey today, see it on the Unusual Incident Report, which is what a non-injury incident becomes there. Centers elsewhere file the standard Incident Report, which doesn't ask it.
The report follows the state on your center's address. Most centers file one Incident Report. New Jersey centers file the Office of Licensing's Accident / Injury Report for injuries and allergic reactions, and its Unusual Incident Report for everything else, each with that office's own wording and notices.
Yes, in the Witnesses list. Add the child as a row with the Child role, their relationship to the child the report is filed for and their age. Incident Settings controls what the parent's copy shows: nothing at all (the starting point for every center), the row numbered as Child #1 with the relationship and age but no name, or the full row. Keep other children unnamed in What happened? and the other free-text boxes, which are never redacted.
That is the starting behavior. Until an owner changes Incident Settings, the witnesses list is kept on your copy only and left off the parent's. Your own view of the report is unaffected. If you want parents to see the rows, an owner can switch to numbering children and others, or to showing everything.
Export opens the report in a new browser tab, so a pop-up blocker can stop it. Allow pop-ups for KidzLog, then try again.