

Document Library
The Documents area is where your center shares paperwork with families and collects signatures, acknowledgements, and uploads in one place. Instead of printing forms and chasing paper, you build a library of documents once, then send them to a child's guardians and watch each one get completed.
The Library is the first of three tabs under Documents. It holds the master copy of every document your center uses, along with the steps each one needs before it counts as complete.
How to Access
Open Documents from the sidebar
In the left navigation, choose Documents. You will land on the Library tab.

Switch between the three tabs
- Library holds your documents.
- Packets groups documents into bundles you can send together.
- Requests tracks everything you have sent to families.
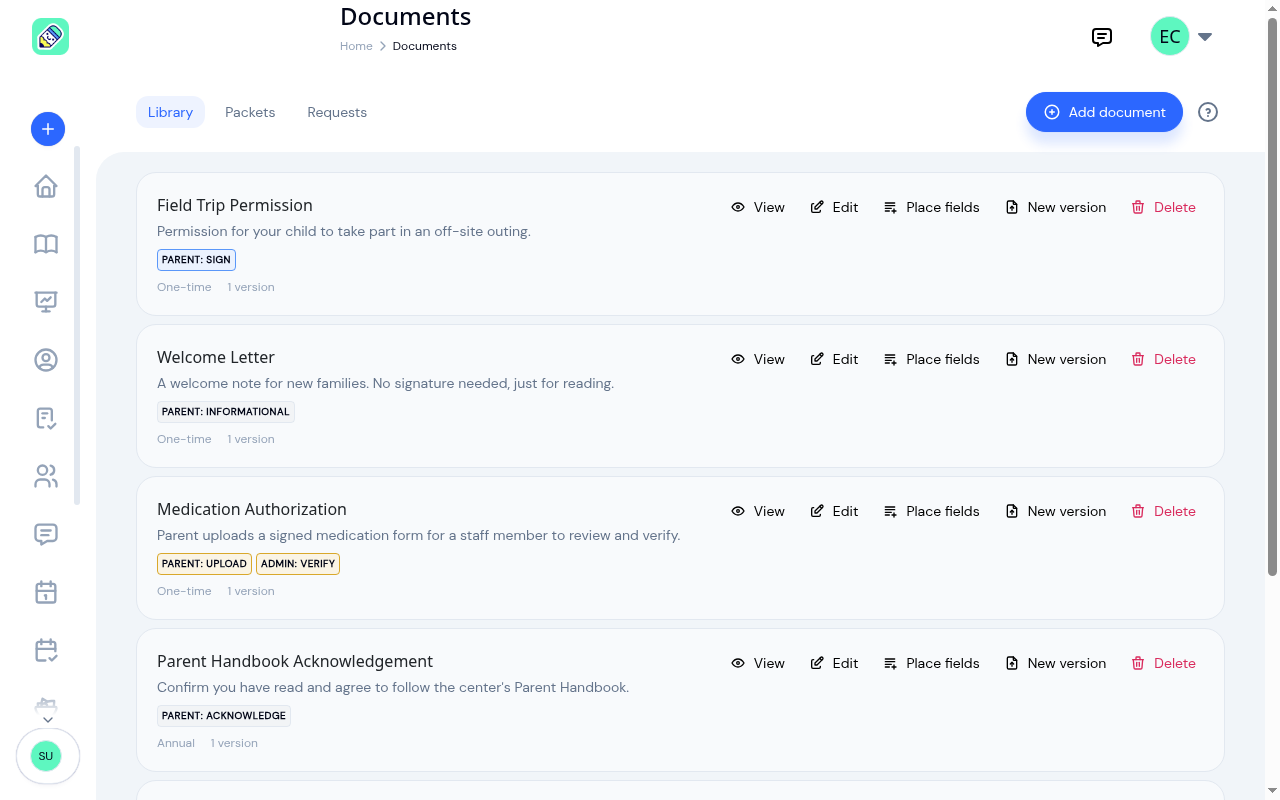
Your document library
Each document appears as a card showing its name, an optional description, the steps it needs, how often it repeats, and how many versions you have uploaded. Its actions sit on the right, each with a label: View, Edit, Place fields, New version, and Delete. Place fields opens the editor where you mark up the PDF for signatures and answers; see Placing Fields on a Document.
Reading a document
Click anywhere on a document's row, or choose View, to open its own page. This is where you check what a document actually says before you send it to families.
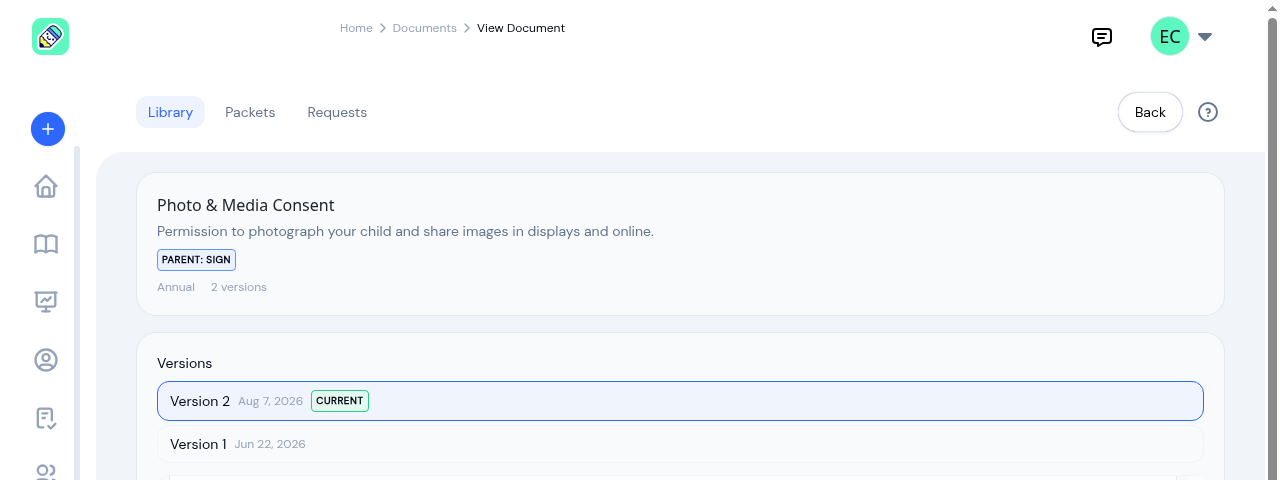
The page shows:
- The document's details at the top: name, description, the steps it needs, its recurrence, and how many versions exist
- Versions, newest first, with the one families currently receive marked Current
- The document itself, rendered page by page underneath, with arrows to move between pages
Select any version in the list to render that one. You aren't limited to the current version, so you can check what an older copy said. Open in a new tab gives you the plain PDF if you'd rather read it full-screen or print it.
Adding a document
Select Add document in the top right. Give the document a name and an optional description, choose how often it repeats, set the steps it needs, and upload the PDF.
Recurrence
Recurrence tells KidzLog how often a family needs to complete the document:
- One-time — completed once and then it's done.
- Annual — collected again each year, useful for consent forms that families renew.
- On version change — only re-collected when you upload a new version of the file.
Required steps
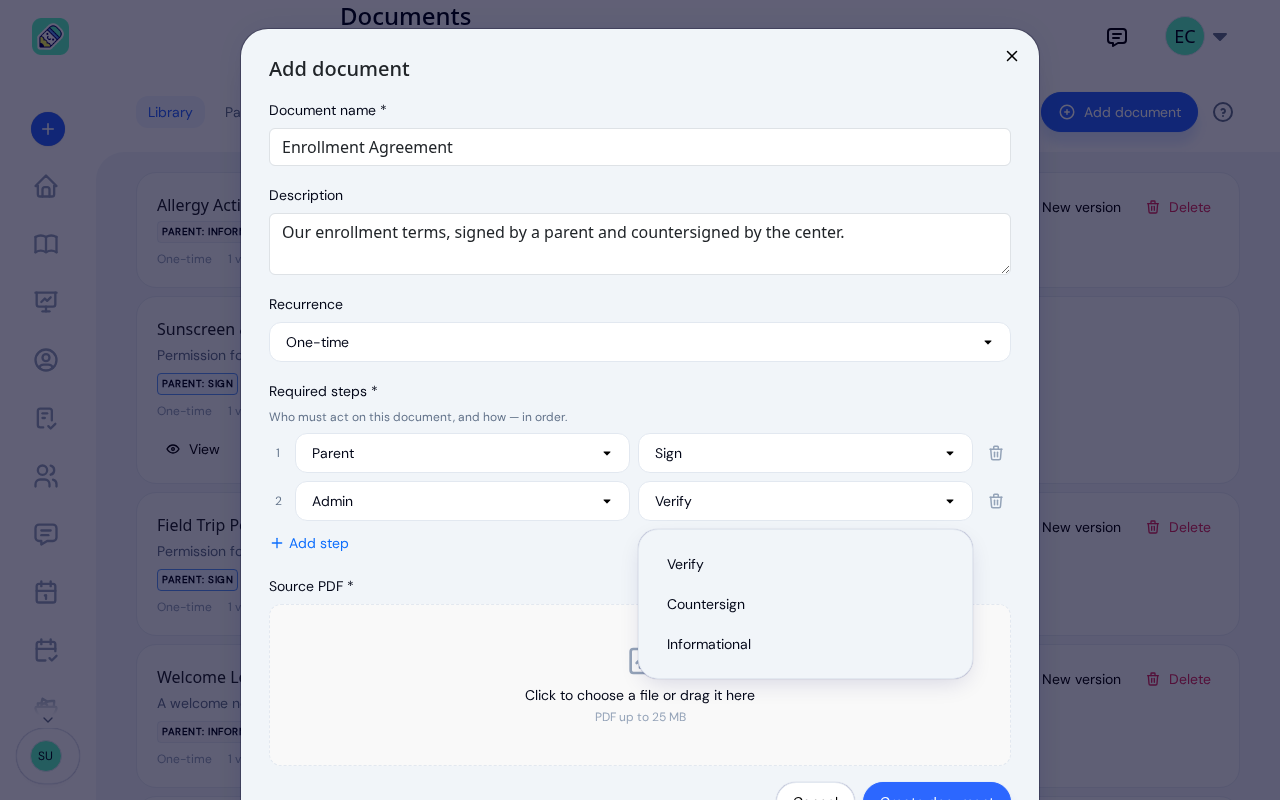
Steps decide who acts on the document and how they act. You can add more than one step with Add step, and they happen in the order you list them: the second step only opens once the first is finished.
For each step, pick a role (Parent, Admin, or Owner), then an action. The actions on offer depend on the role, because each one is something that person can actually do in KidzLog:
- Parent — Sign (draw a signature on screen), Acknowledge (confirm they have read and understood it), Countersign (a second parent signature after an earlier step), Upload (send back a signed paper copy or a clear photo), or Informational (just read it).
- Admin or Owner — Verify (review a copy a parent uploaded and mark it accepted), Countersign (add a staff signature after the family has signed), or Informational.
When you change a step's role, its action switches to one that role can do.
Admins and owners complete their steps on the Requests tab, where a Verify upload or Countersign button appears on the request once it is their turn. A staff countersign asks for consent to sign electronically first, the same consent parents give.
A few examples from a typical center:
- A Photo & Media Consent form is one step: the parent signs.
- An Enrollment Agreement is two steps: the parent signs, then the owner countersigns.
- A Medication Authorization is two steps: the parent uploads a signed copy, then an admin verifies it.
- A Welcome Letter is a single informational step: families just read it.
Source PDF
Every document needs a source PDF, up to 25 MB. This is the file families see when they open the document. Drag a file onto the upload area or choose one from your computer, then select Create document.
Updating a document with a new version
When a form changes, you don't create a new document. Choose New version on the document's row and add the updated PDF, then select Upload version.
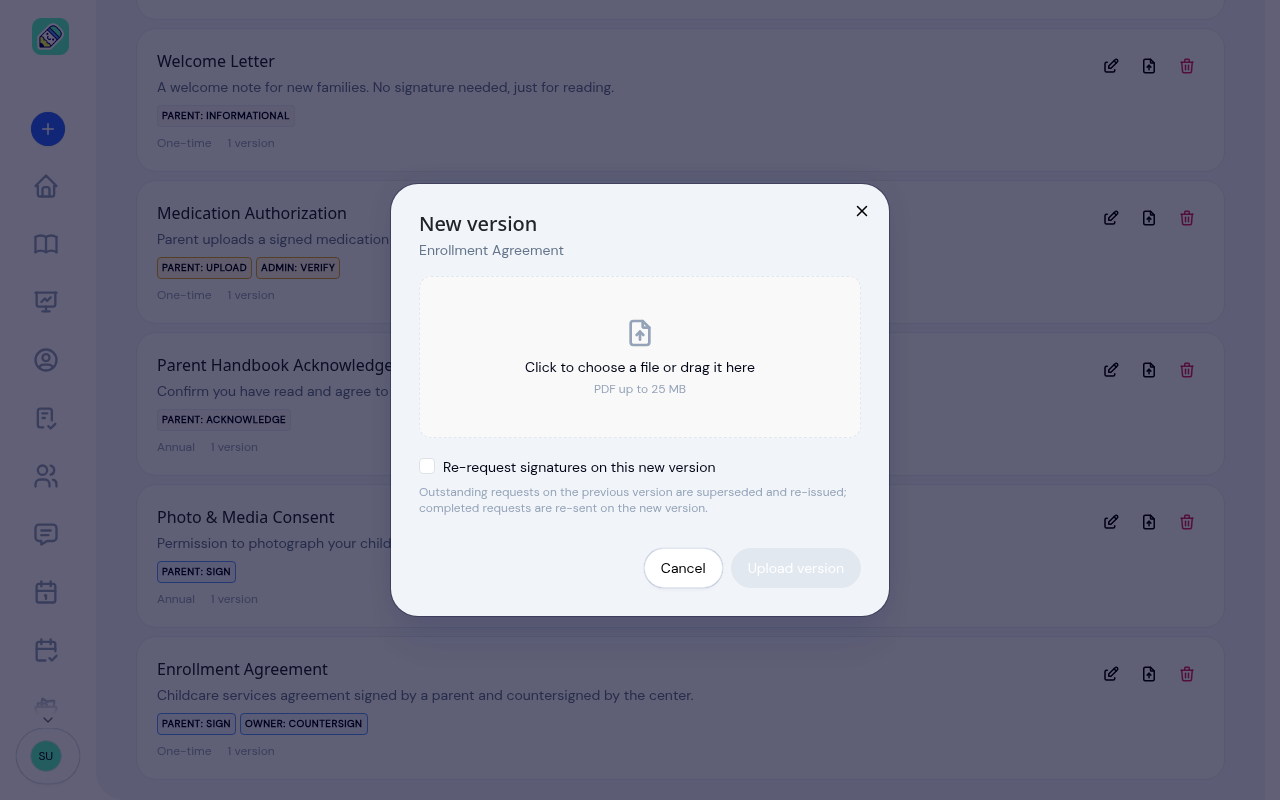
Tick Re-request signatures on this new version when the changes are important enough that families need to sign again. Outstanding requests on the old version are replaced with the new one, and families who had already completed the previous version are asked to complete the new copy.
Editing and removing documents
Use the actions on the document's row:
- Edit changes the name, description, recurrence, or steps.
- New version uploads an updated PDF, as described above.
- Delete takes the document out of your library after you confirm in the Remove document window. If the document has already been completed by a family, it is kept as a Retired document instead of being deleted, so your records stay intact. Retired documents show a grey Retired label and can no longer be sent.
Next steps
- Bundle related documents into a packet you can send in one action.
- Send documents to families and track them on the Sending & Tracking page.
Frequently Asked Questions
Yes. Add a step for each person who must act, in the order they should act. For example, a parent signs first and the owner countersigns second. The next step only opens once the previous one is finished.
Not at the moment. Teachers don't have a Documents screen, so Teacher isn't offered as a step. Give staff steps to Admin or Owner instead.
Sign asks the parent to draw a signature on their device. Upload asks the parent to send back a signed paper copy or a clear photo, which a staff member then verifies. Use Upload when a form has to be printed and signed by hand.
Editing the name, description, or steps does not undo anything families have finished. To replace the actual file, upload a new version and decide whether families need to sign the updated copy.